I prepare my painting surfaces in a three-step process that ensures optimal oil paint application, enhances the finished look, and increases the longevity of my paintings. Although I describe my process in terms of prepping panels, I use the same method to prepare canvases, whether they’re pre-primed store-bought or ones I’ve stretched myself.
Here are the three steps:
1) Sealing the panel: GAC-100
This essential first step is to seal the panels to block the natural acids in the wood from seeping into your paint and your paint oils from leaching into the wood. Aside from reducing the longevity of your work, this cross contamination can also reduce the vibrancy of your colours. In other words, the first layer is there to provide a barrier between the wood and your paint.
For this step, I apply two coats of the sealant Golden GAC-100 to the panel surface using a small roller to create a smooth, even surface. Once dry, I gently scrape the surface with a paint scraper to remove any bumps, imperfections, or stray hairs (an inevitability when owning a golden retriever). The GAC-100 will be dry to the touch after just a few hours after which you can apply a second coat. These layers typically take two days to fully dry. Note: for this step to be considered archival the GAC-100 on panels needs to be applied to the front and back surfaces, and edges.
2) Creating a surface to paint on: Oil Ground
While the GAC-100 creates a barrier between the oil paint and the wood, it is also a slippery and non-absorbent surface, making it a poor surface to paint directly on. Thus, the next step is to apply an oil ground over the sealant to create a more toothy, adherent, and opaque surface ready to receive your paint. This is also the step during which you can add some tone or texture to your surface, though that’s not something I generally do.
The oil ground I use is Gamvar Oil Ground applied in two coats. The coats should be applied in thinly about 1-3 days apart, with the second layer applied only after the first is dry to the touch. Out of the can, Gamvar Oil Ground is quite thick, so needs to be thinned with Gamsol at a ratio of about 1:4 (solvent:oil ground) or until it reaches the consistency of warm butter. The layers usually take around 10 days to dry fully, though it may take longer if your studio is humid. Between each layer, I use the paint scraper again to gently scrape away rough patches and hairs.
3) Optional Step: Toning
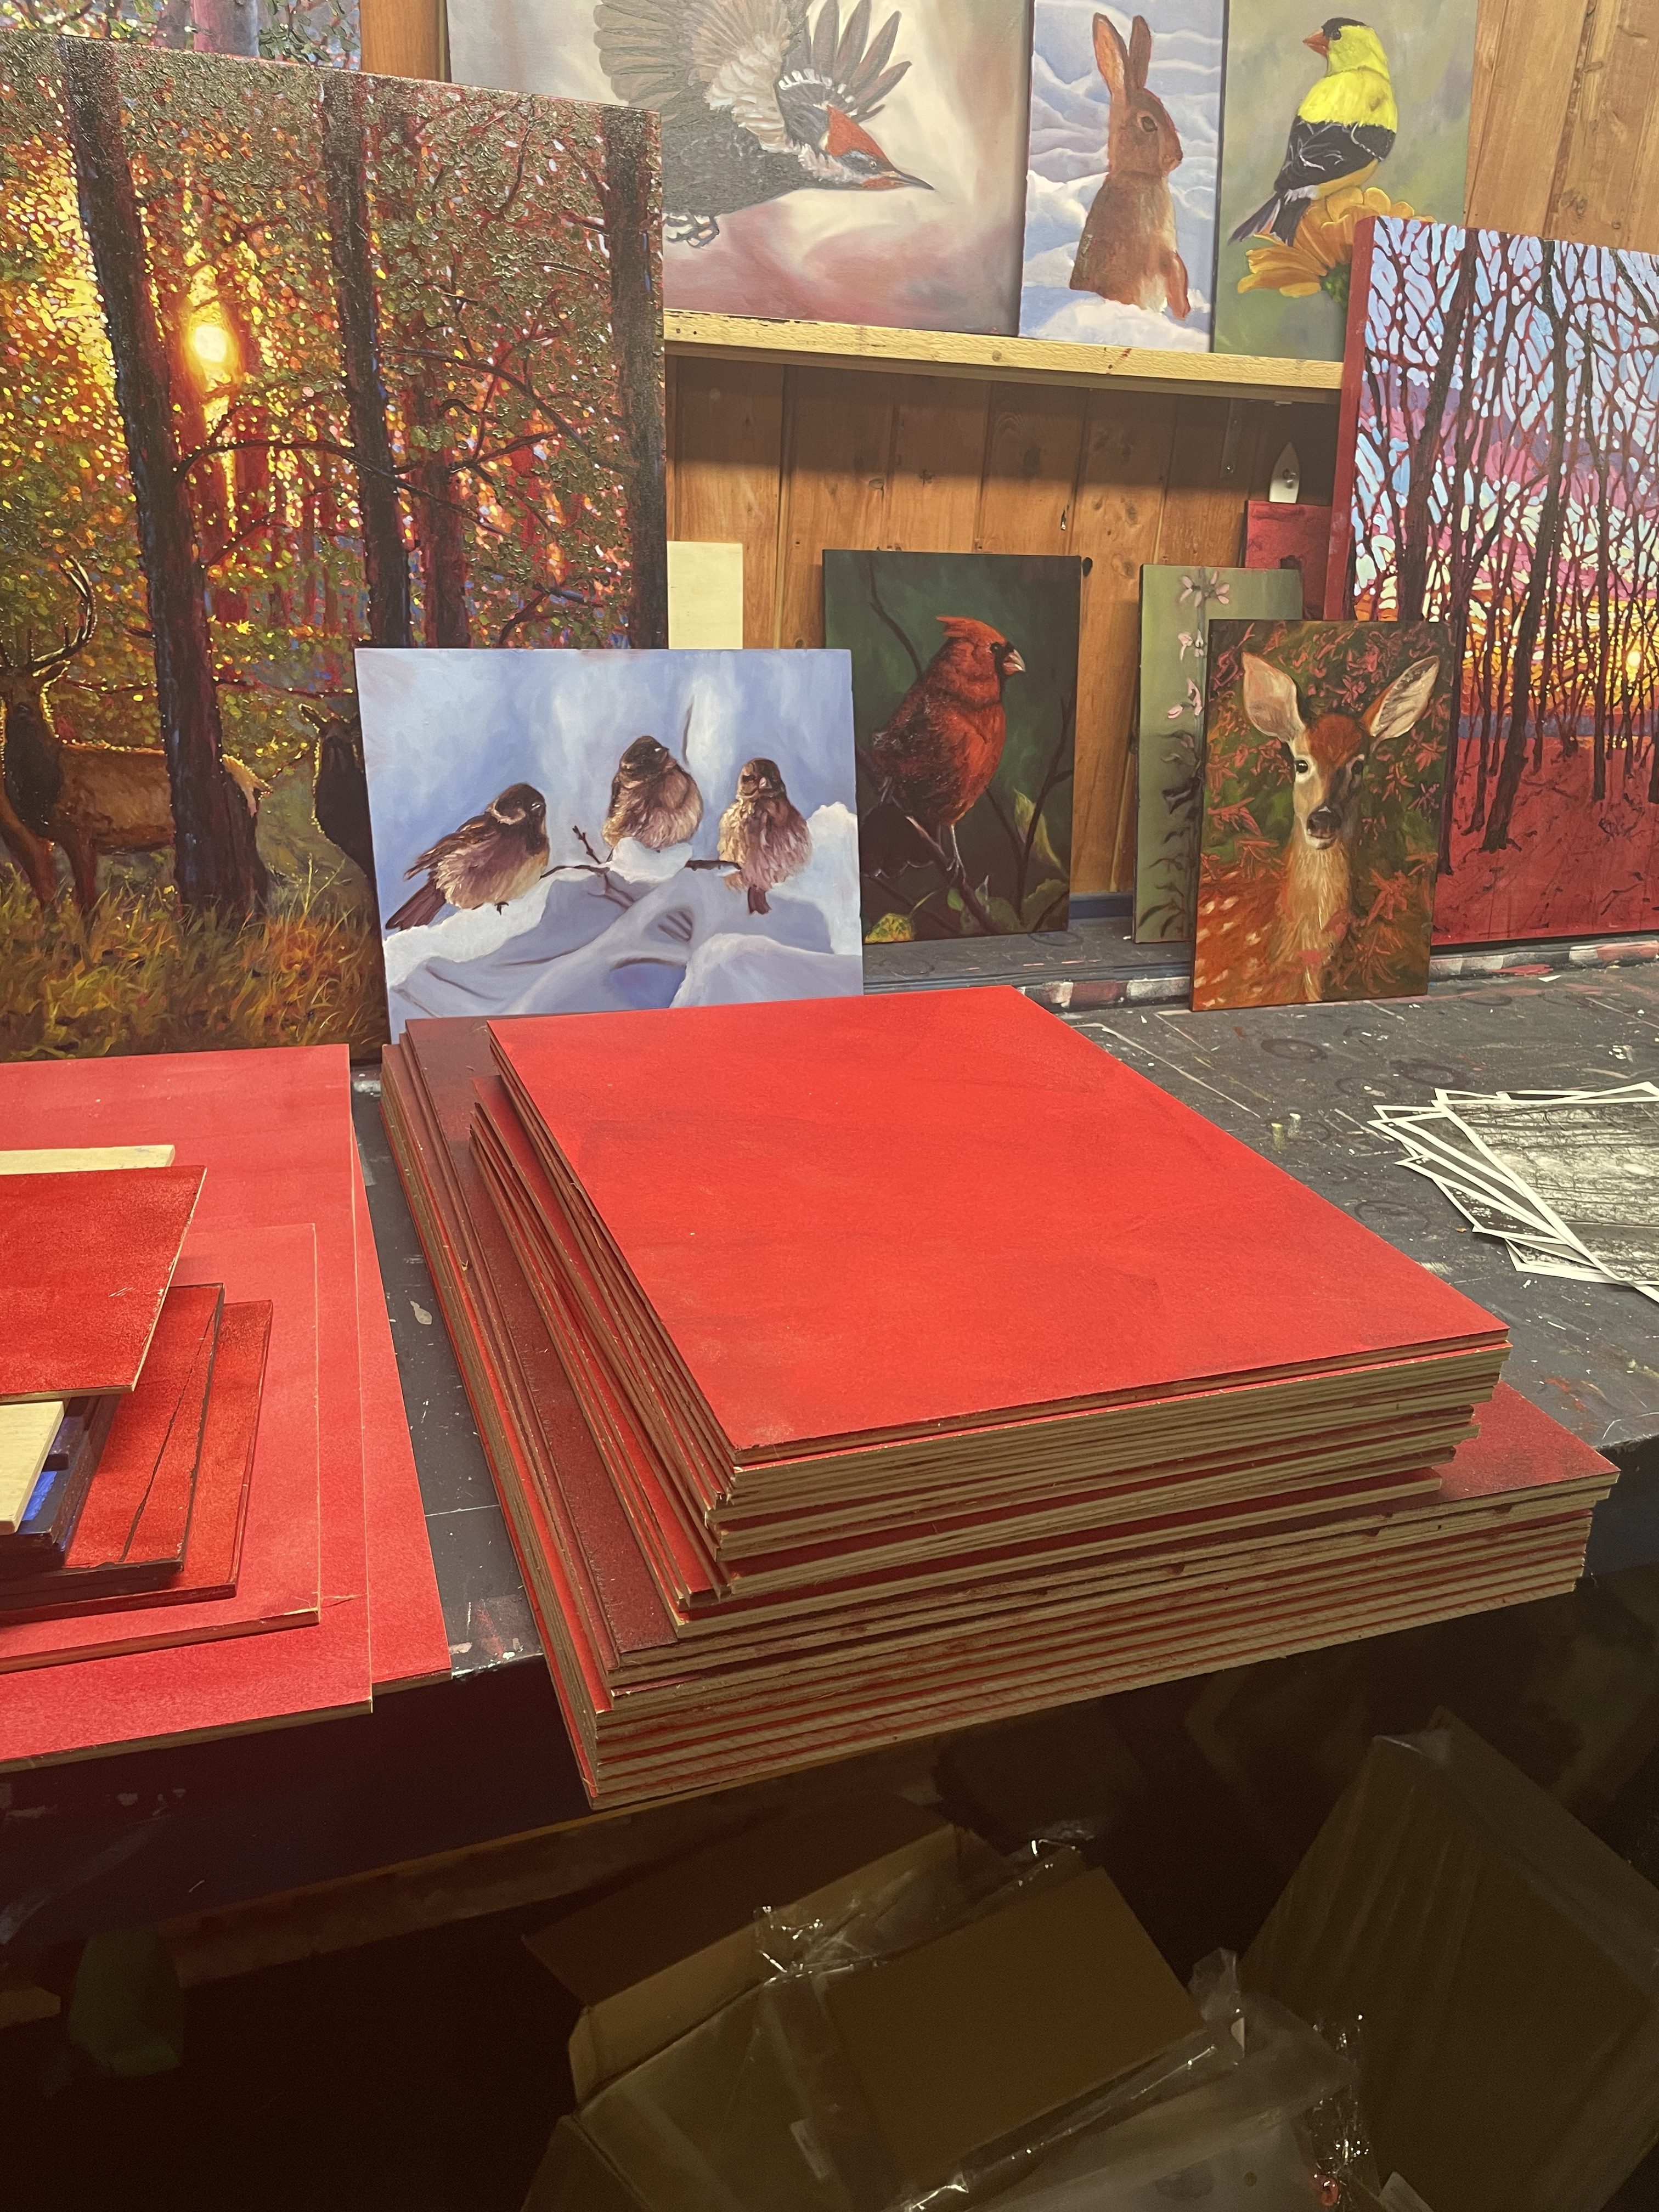
While this step is optional, I prefer to paint on a toned surface as I find it easier to see values and colours on a non-white surface. For toning, I mix normal oil paint with Liquin on my palette and apply it to the surface using a foam roller. For colours, I prefer something warm like Permanent Alizarin Crimson, though I’ll often mix it with Burnt Sienna or Ultramarine Blue to adjust the hue and speed up drying – pure Alizarin Crimson is notoriously slow to dry. I typically apply two layers to achieve the depth of tone I like. This step often takes another 10+ days to dry before the panel is ready for painting.
Bonus Pro-tip
For efficiency, I seal and ground my panels before cutting them to size. I usually buy 24×48” (1/4″ thick) birch or oak plywood panels in batches of six and prepare them all side by side on my studio floor—this is far more space-efficient than managing dozens of small pre-cut panels. As each layer is applied, I can lean and stack the panels against the wall to dry, saving space while keeping everything organized. Note that if you cut them this way, after you have sealed and applied ground, you will need to reapply GAC-100 to the cut edges for them to be considered archival.
Materials list
- GAC-100
- Gamsol
- Gamvar oil ground
- Rollers (or brushes) plus paint tray
- Paint scraper
- Hardboard or plywood (2×4′ and 1/4″ thick or whatever your preference)
- Oil paint & Liquin for toning
Leave a Reply